How to Set Up a POS System in UAE: Step by Step
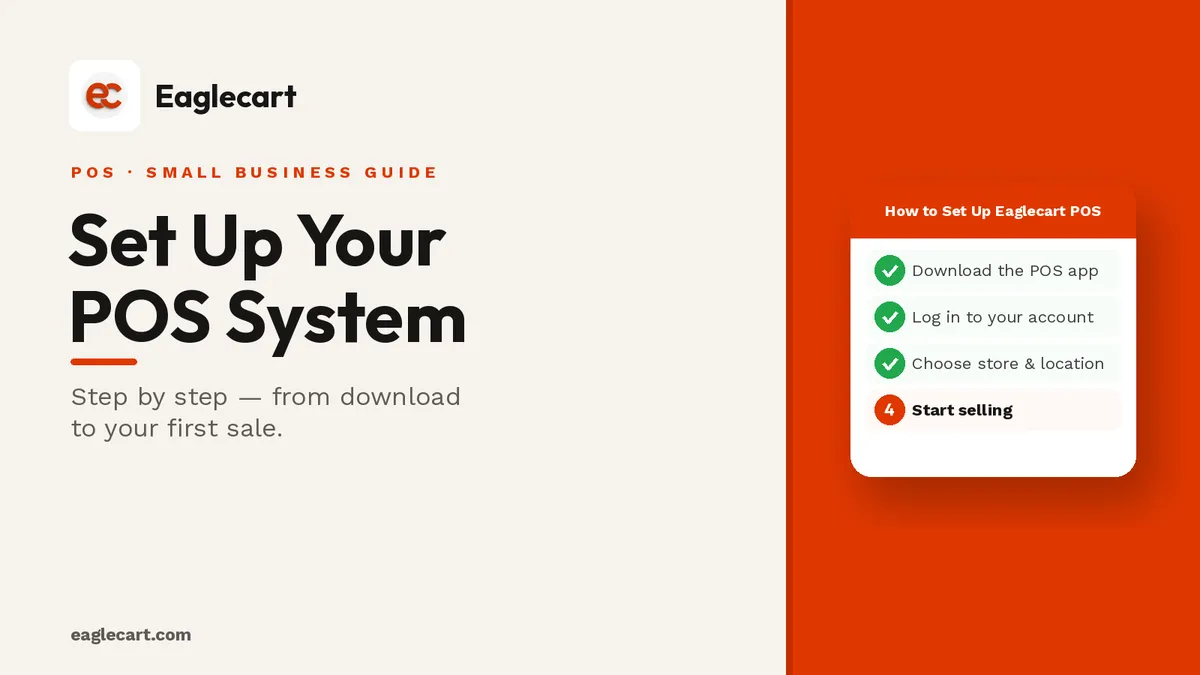
Setting up a POS system does not have to be a project. With Eaglecart, the full setup is four steps: download the app, log in, choose your store and location, and start selling. Your products are already there — the same catalogue you manage in your dashboard — so there is nothing to reenter and nothing to import.
This guide walks through every step for both desktop and mobile, so you can follow it whichever device you are setting up on.
One thing I always tell new merchants: do not overthink the setup. The biggest mistake is waiting until everything is "perfect" before you start. You can adjust your products, prices, tax settings and location details from your dashboard at any time. The setup takes minutes — the selling can start today.
Key Takeaways
- Eaglecart POS runs on web and desktop, iOS and Android — install once, sell from any device.
- Your products and stock are already in the system from your dashboard — no duplicate entry needed.
- Setup is four steps: download, login, choose store and location, sell.
- You can adjust prices, tax settings, language and location at any time from settings.
Before you start: what you need
You need an Eaglecart account. If you do not have one, create it at admin.eaglecart.com — it takes two minutes. Once you are logged in to your dashboard, make sure you have added at least one product and set up at least one location. Your POS pulls both from the dashboard, so those need to exist before you open the till.
That is it. No hardware to buy, no installation fee, no technician needed. The POS runs on the phone or desktop you already own.
Step 1: Download the Eaglecart POS app
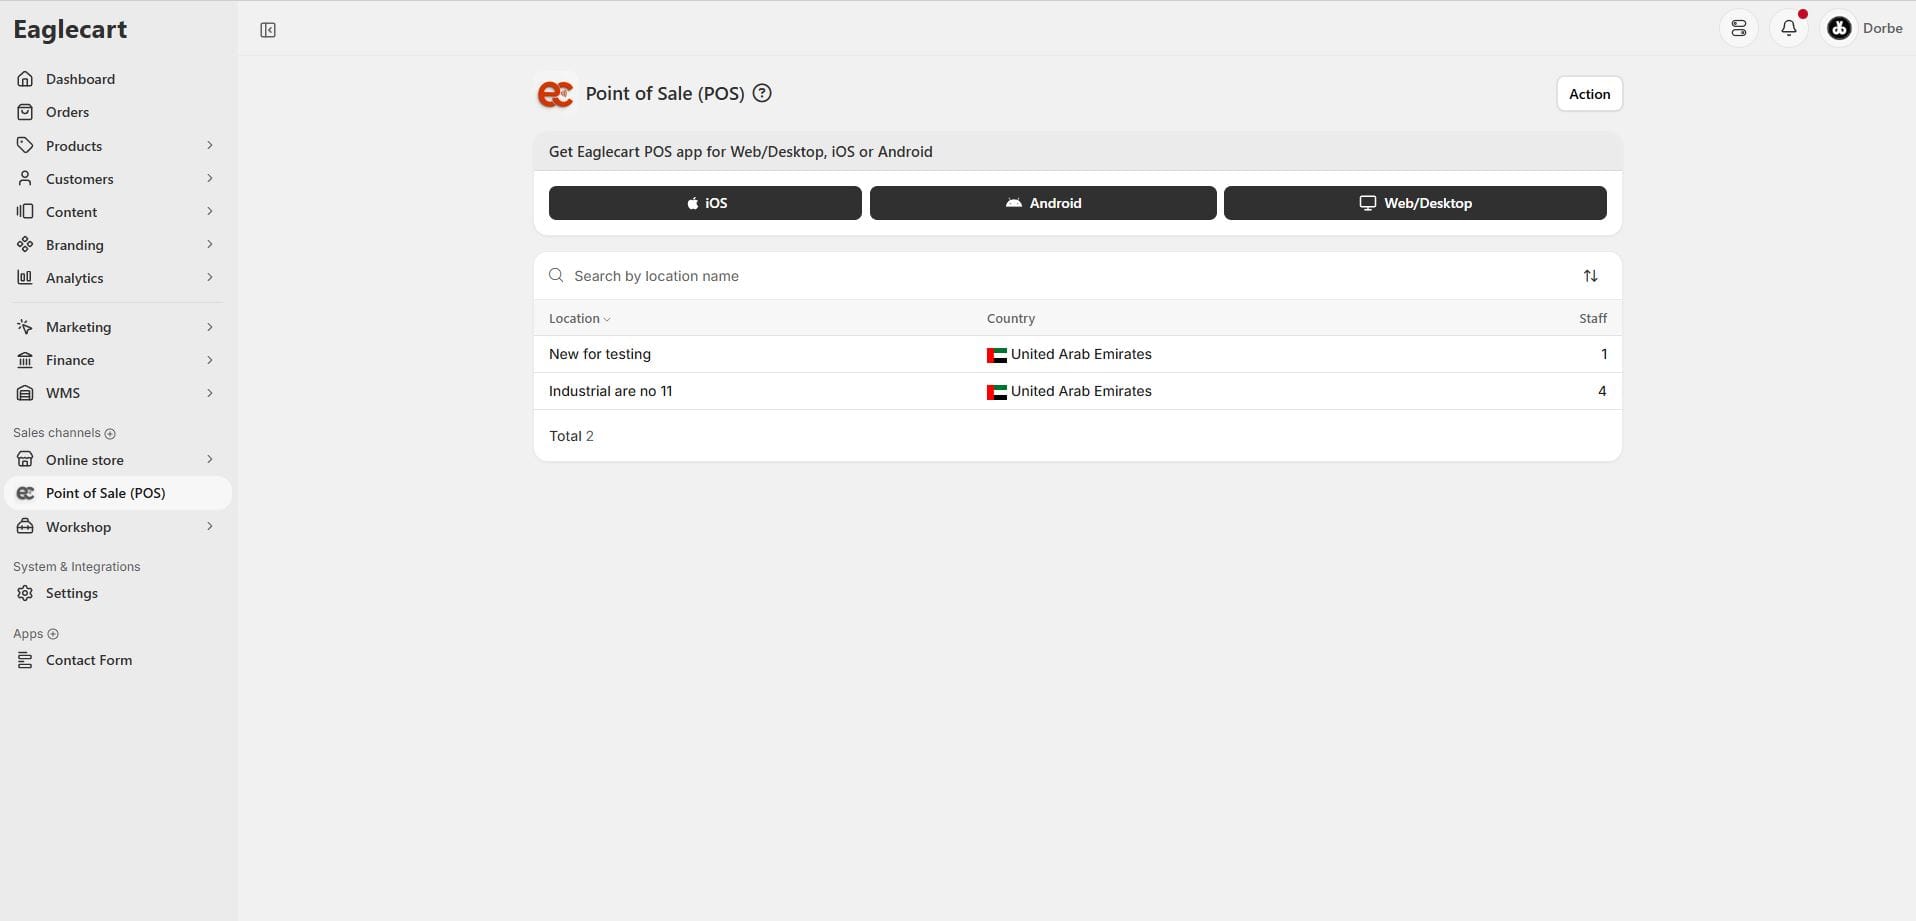
From your Eaglecart dashboard, go to Point of Sale in the left menu. You will see three download options: iOS, Android and Web/Desktop. Choose the one that matches your device.
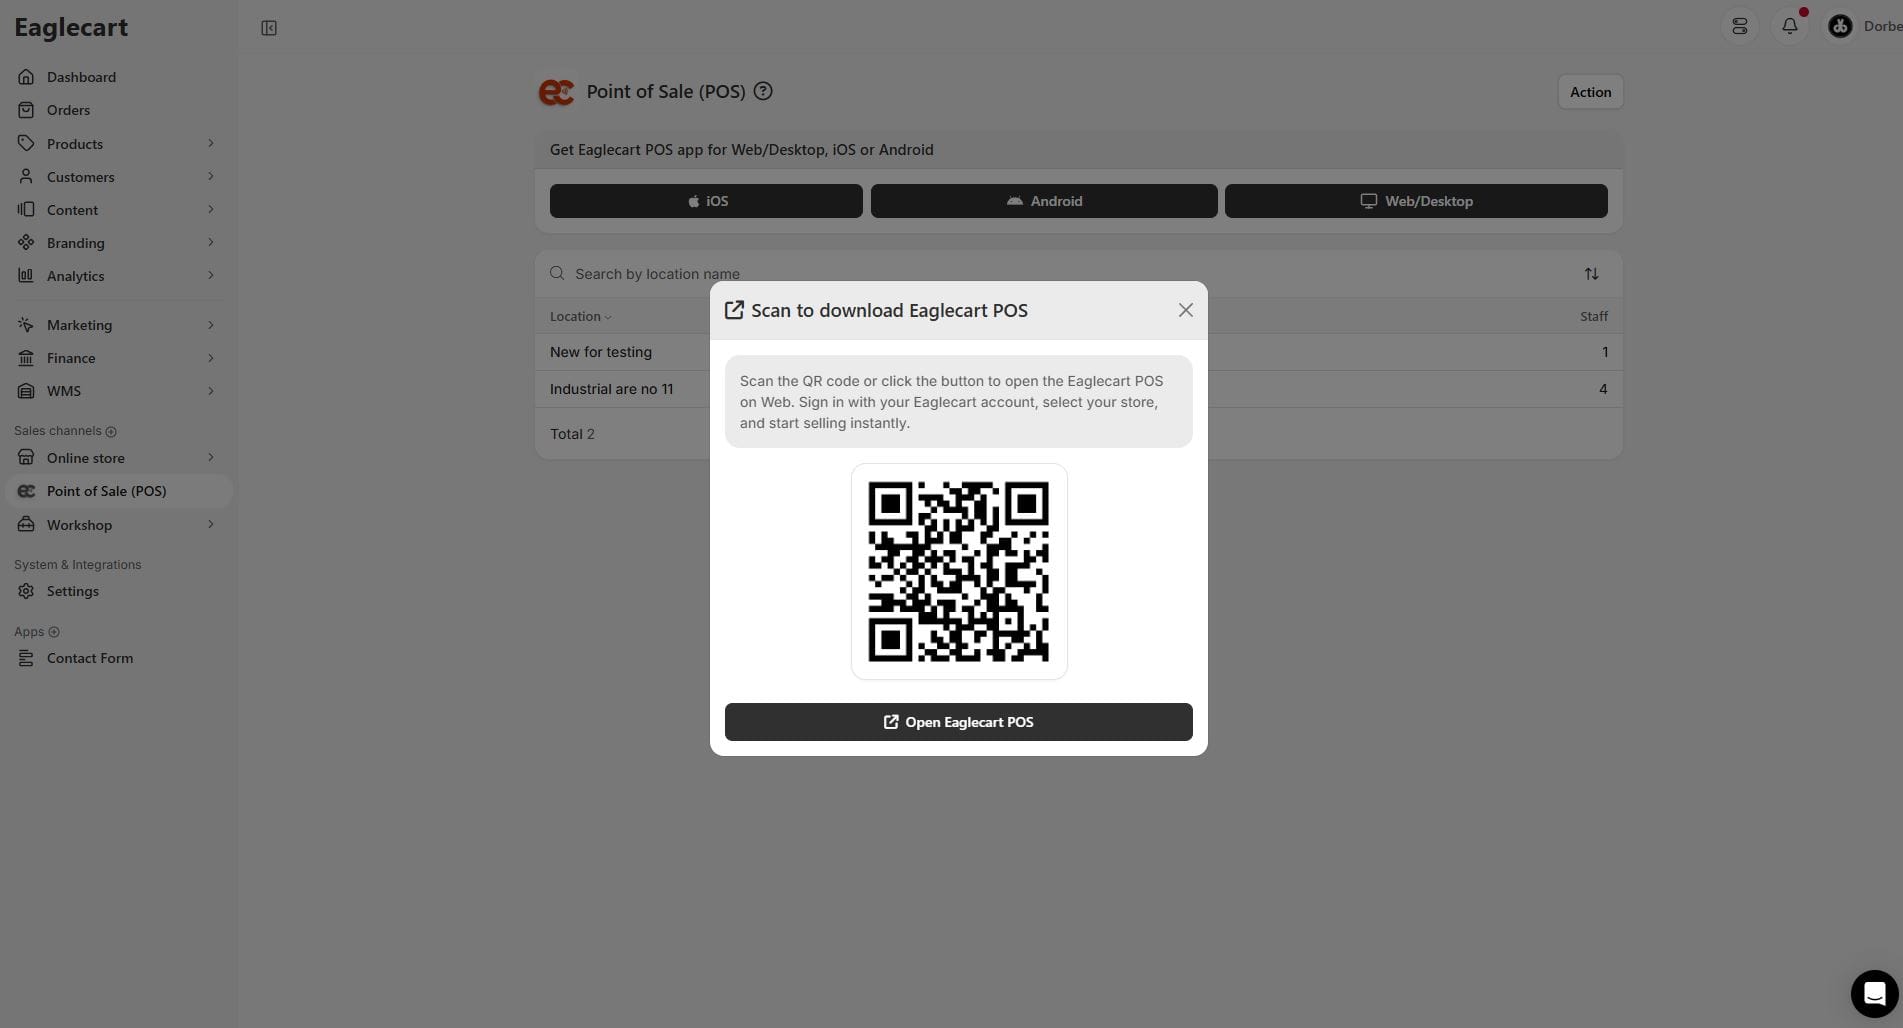
iOS and Android: tap your platform button and it takes you to the app store. Download and install the Eaglecart POS app like any other app.
Web/Desktop: clicking the Web/Desktop button opens the POS in your browser. From there you can install it as a desktop app in one click — the browser offers to add it to your taskbar or desktop, and it then opens as its own window without the browser toolbar. This is what most desktop counter setups use.
Step 2: Log in with your Eaglecart account
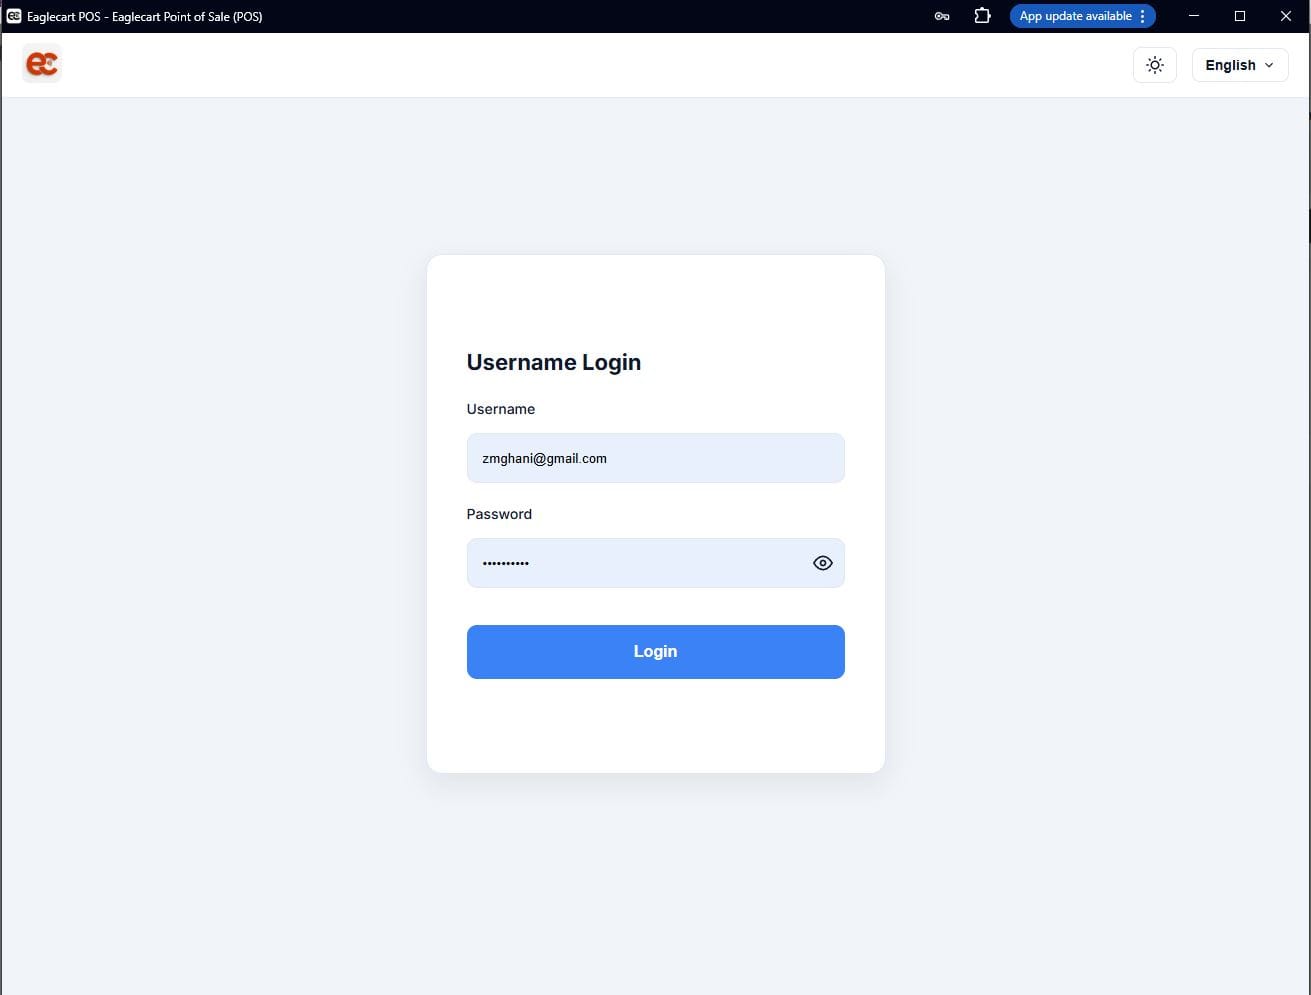
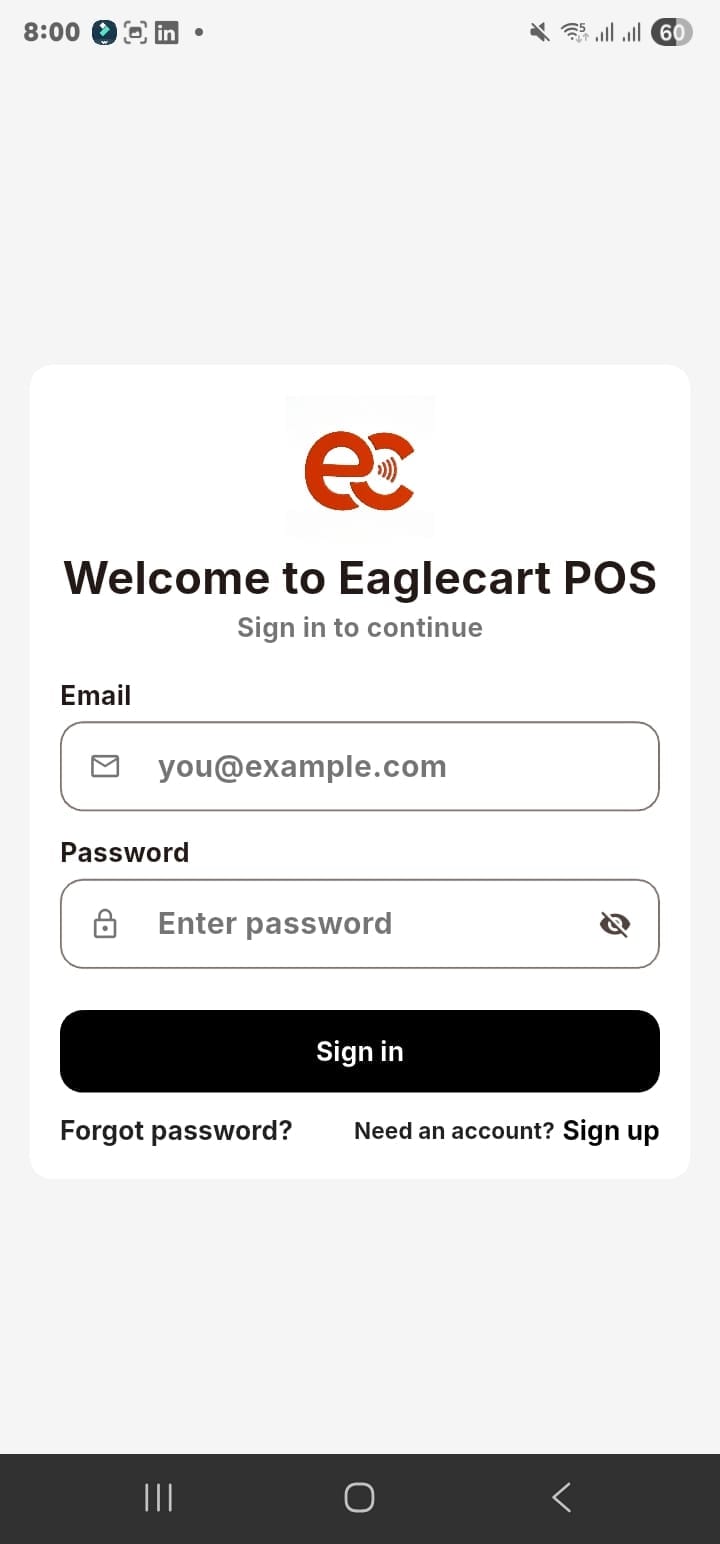
Open the POS app. On desktop you will see a username login screen — enter your Eaglecart email and password. On mobile you will see the Eaglecart POS welcome screen with the same email and password fields.
Use the same login you use for your Eaglecart dashboard. There is no separate POS account to create. If you have staff who need their own login, you add them as users from the dashboard under Settings, give them a role, and they use their own credentials to log in to the POS.
Step 3: Choose your store and location
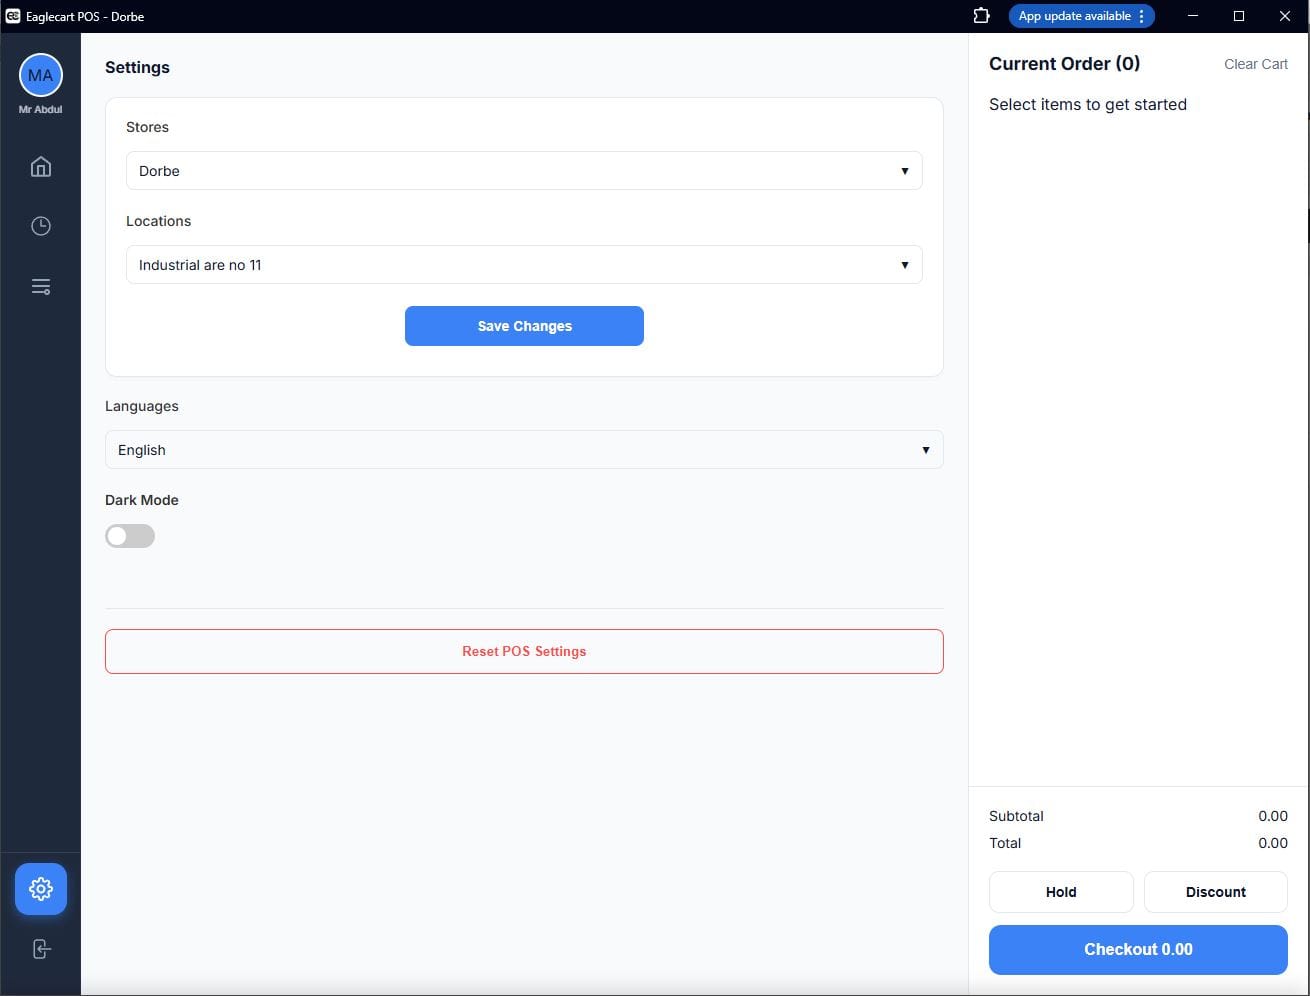
After logging in, the POS asks you to set up your store: choose your store name from the dropdown and then choose the location. This tells the POS which till it is — so sales, stock and reports are recorded against the right place.
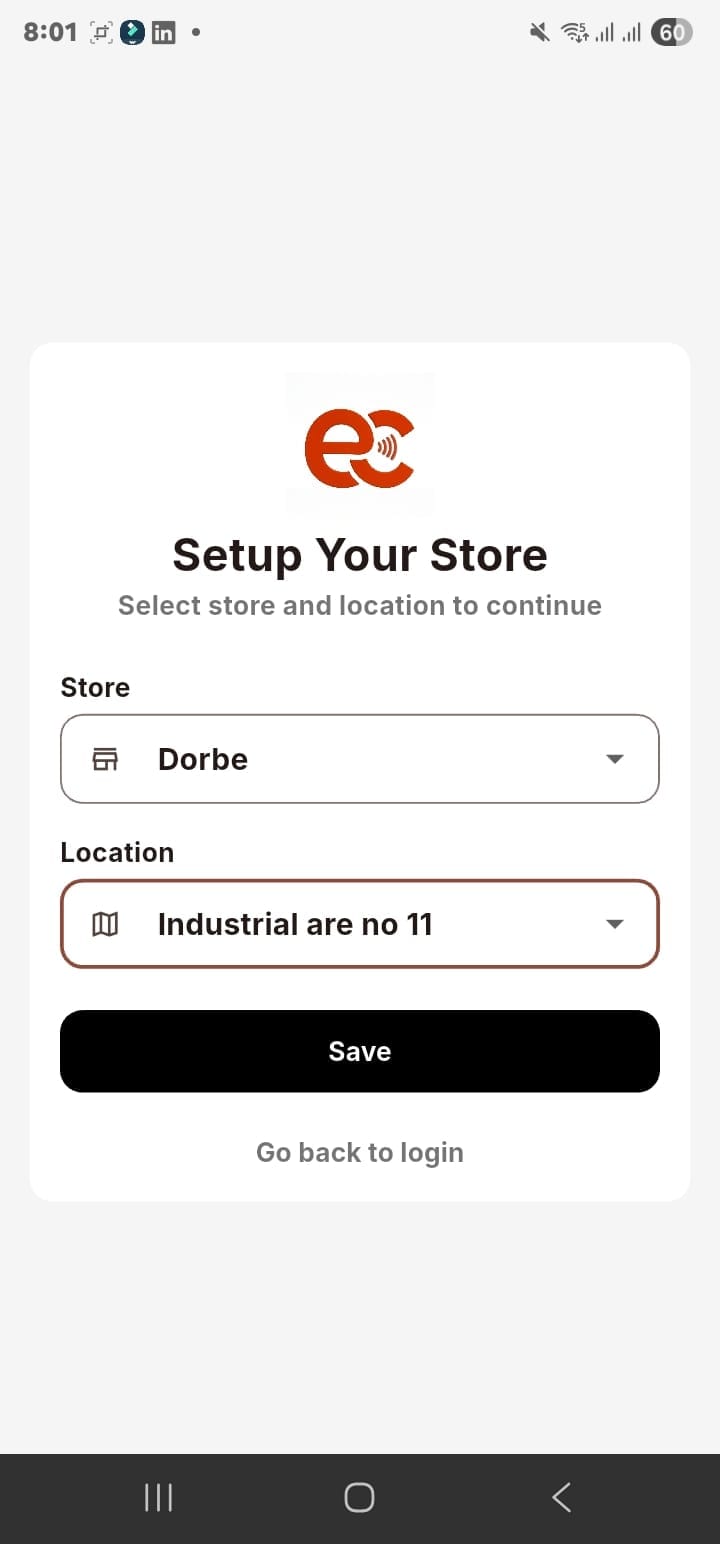
If you run more than one shop or counter, each device picks its own store and location at login. All of them roll up to the same dashboard, so you see every location's sales and stock in one place. If you only have one location, just select it and tap Save — you are done with this step.
Step 4: Check your settings
Before your first sale, take one minute to check Settings in the POS. You will find three things worth confirming.
Language: the POS supports Arabic and English. Choose the language your till staff prefer — this only affects the POS interface, not the receipt, which uses your dashboard settings.
Store and location: confirm the right ones are selected. If you ever need to switch — a staff member using a phone at a different location — they reset the POS settings here and choose the new store and location.
Dark mode: toggle it on if your counter is in a low-light area. Purely optional, but your staff will appreciate it on a long shift.
Step 5: Your products are already there — start selling
Once you have chosen your store and location, the POS opens directly to the sale screen. Your products are already loaded from your dashboard catalogue — with names, prices, photos, variants and VAT settings exactly as you set them up. There is nothing to import, nothing to re-enter.
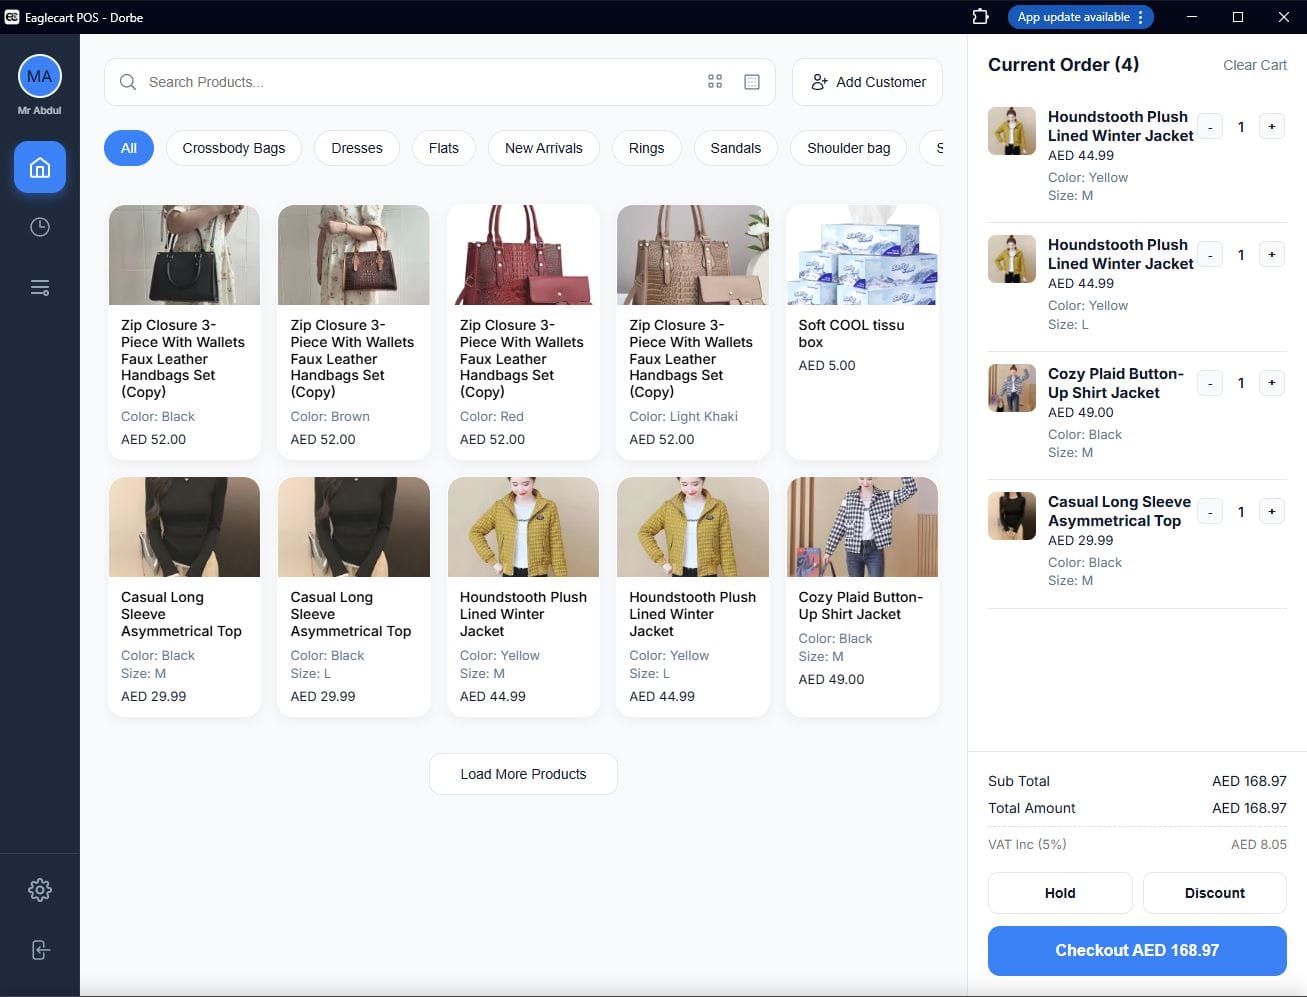
Search for a product by name, tap through the category tabs, or scan a barcode — and you are on your way to your first sale. The rest of the flow (add to cart, take payment, give receipt) is covered in detail in the How a POS System Works article in this series.
What to set up in your dashboard before opening the till
The POS reads directly from your dashboard, so a few things are worth checking there before you start selling. None of these stop you opening — you can fix them any time — but getting them right first saves edits later.
- Products and prices: confirm each product has a correct price set. The POS will show whatever price is in the dashboard.
- VAT: make sure your tax rate is set correctly in Settings. Eaglecart handles the 5% VAT calculation on every sale and prints it on the receipt automatically.
- Stock quantities: set the opening stock for each product. Once you start selling, the POS keeps the count for you — but it needs accurate starting numbers.
- Location: if this is the first time you are using this location, make sure it is created in your dashboard under Settings, otherwise it will not appear in the POS location selector.
Adding staff to the POS
If you have staff who will run the till, add them as users in your dashboard. Go to Settings, then Users, add their name and email, assign their role, and they will receive login credentials. Each staff member logs in to the POS with their own email and password — you never need to share the owner account.
Roles let you control what each person can see and do. A cashier can sell and process payments; a manager can apply discounts and access reports; you keep full control as the owner. All of this is managed from your dashboard, not from the POS itself.
Switching location or resetting the POS
If a staff member needs to switch from one location to another — or if you are setting up the same device for a different store — go to POS Settings and tap Reset POS Settings. This clears the saved store and location, and the next login will ask again. It does not delete any sales or data — it just lets you choose a new store and location on the next login.
Frequently asked questions
How long does it take to set up a POS system in UAE?
With Eaglecart, the POS setup itself takes under ten minutes — download, login, choose your store and location, done. If your products are already in your dashboard, you can make your first sale the same day.
Do I need to buy special hardware to run a POS in UAE?
No. Eaglecart POS runs on the phone or desktop you already own. If you want to print receipts you can connect a receipt printer, but you can also send receipts by WhatsApp or email without any printer at all.
Can I add staff to the POS without sharing my password?
Yes. Add staff as users in your Eaglecart dashboard, assign them a role, and they log in with their own credentials. You keep full control as the owner without sharing your account.
What happens if I set up the POS on the wrong location?
Go to POS Settings and tap Reset POS Settings. The next login will let you choose the correct store and location. No data is lost — only the saved location preference is cleared.
Can I use the same Eaglecart account on multiple POS devices?
Yes. Each device logs in and selects its own store and location independently. All sales from all devices feed into the same dashboard, so you see the full picture in one place.